New external hard drive installed. Check and check.
This gets two checks because it's a networked drive. The Resident Computer Geek gets bonus points on this one. We can access brewing files from any computer on our network, including our smart phones. Booyah! This brewing operation is nothing if not high-tech.
Now I can proceed as planned. With photos, y'all.
So, where was I? Oh, yes. Brewing a Double IPA.
The effort to brew beer takes several weeks and has a number of phases, marked by exertions on specific days. By my count, Phase 1 begins with Brewing Day. Phase 2 is Racking to the Secondary Fermenter Day (I really need to get a better name for that....uh...Racking Day?). Phase 3 is Bottling Day. Phase 4 is Drinking Day.
Phase 4 may be the most awesome phase ever. But the others are different kinds of fun.
Brewing Day (the longest of the days, depending on how committed you are to Drinking Day) starts with a collection of various pieces of equipment and ingredients and a vigorous cleaning and sanitizing effort. The Day ends when you have a fermenter full of yeast-fed liquid all sealed off and ready for a week or so of fermentation.
But here's how you start the process of getting from here to there.
We'll start with ingredients:
 |
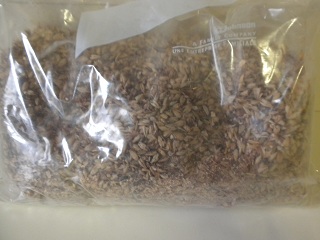
| A mix of specialty malts (mostly for flavor) |
 |
| An assortment of hops (for bittering and flavoring) |
 |
Liquid extract (which provides most of the sugar for the beer and is REALLY sticky) and yeast (in cute, smackable pouches called "smack-packs") |
In all, there are four basic ingredients for beer: water, yeast, hops and grain. Done.
Well, there's also magic. And fairy dust (the sanitary, non-dusty kind).
More on that later.
A quick word about our brewing process. We do what's called "partial-extract" brewing. Which means that most of our sugars are in pre-prepared liquid form (the brown bottles above). This means that we are cheating a bit, and relying on the makers of the liquid extract to do most of the work of getting fermentable sugar out of grain. Advanced home brewers do that part for themselves, which is called "all-grain" brewing. We're not there yet. That takes a level of expertise and equipment investment that we're just not ready for. Plus, we need a better kitchen before we go that route.
And I'll need a full supply of Xanax. For sure.
And I'll need a full supply of Xanax. For sure.
"Partial-extract" brewing means that while we use extracts to help get us started, we do add specialty grains that provide added flavor, and we add our own hops. So, it's not "all-extract." Yes, you can make decent beer using just the extract. But what we do is a bit more fun. Because we get to play with recipe ingredients, but we're not 100% responsible for the hard stuff.
Now on to the equipment. Here's an assortment of what we use on Brewing Day:
 |
| Assorted pots and pans. The biggest one there is the brewpot. I'm madly in love with my brewpot, I must say. (Notice how clean the stovetop is? Pretty much like that only on Brewing Day.) |
 |
| Michael's computer with his nifty Excel spreadsheet that calculates EVERYTHING. (He's promised to write a post explaining how this bad boy works.) |
 |
| Primary fermenter. This is where most of the magic happens. |
 |
| Oxygen tank. As if that wasn't self-explanatory, right? |
 |
| Tube and air stone (grey thing at the end) that gets its one end hooked to the oxygen tank and the other end dropped in the beer. Makes lots of little bubbles. Makes yeast happy. |
 |
| Best. Thermometer. Ever. |
 |
| Assorted widgets. All of which are important. But not enough to name or take separate photos of, apparently. |
 |
| Wort chiller. For cooling down the boiling beer QUICK. |
 |
| Uh, yeah. This is bleach. And I took a picture of it. You're welcome. |
Next up: Putting all this stuff to use.
But I need a break first. This photo-journalism thing is hard.

No comments:
Post a Comment